Model Context Protocol (MCP) — A Practical End-to-End Guide
MCP (Model Context Protocol) is an open standard that lets AI apps (e.g., Claude Desktop, IDEs, custom agents) safely connect to tools and data through servers that expose resources, tools, and prompts. Think of it like a universal “USB-C port” for AI apps—plug in a server and your AI gains new skills without bespoke integrations. (Model Context Protocol)
In this tutorial you’ll:
Understand core MCP concepts (client ↔ server, tools/resources/prompts).
Spin up a minimal Python MCP server and a Node.js MCP server.
Connect locally from Claude Desktop via JSON config.
Run everything in Docker (plus a Compose file for multi-server dev).
Try practical tasks (filesystem, HTTP call, Docker control).
Lock down permissions and debug common issues.
If you’re new to MCP, skim the official overview first to see how the parts fit together. (Model Context Protocol)
1) Prerequisites
Python 3.10+ and/or Node 18+
Claude Desktop (optional but convenient client)
Docker + Docker Compose (optional, for containerized workflows)
A terminal and a code editor
Official SDKs and docs: Python SDK, Node SDK, quickstarts, and Claude configuration. (GitHub)
2) MCP in 3 minutes (Concepts)
Server: A process you control that exposes:
Tools — callable functions (e.g., “search_web”, “create_repo”).
Resources — read-only items (e.g., files, DB rows, API responses).
Prompts — reusable prompt templates.
Client: The AI app (Claude Desktop, your own chatbot) that connects to servers via transports like stdio or HTTP/SSE. (Model Context Protocol)
3) Quick Start: Python MCP Server
Create a tiny server with one tool (say_hello) and one resource (/time).
mkdir mcp-python-hello && cd mcp-python-hello
python -m venv .venv && source .venv/bin/activate  # Windows: .venv\Scripts\activate
pip install mcp
server.py
import asyncio, json, datetime
from mcp.server import Server
from mcp.types import Tool, TextContent
from mcp.server.stdio import stdio_server

server = Server("python-hello")

# ---- Tools ----
@server.tool()
async def say_hello(name: str) -> str:
    """Return a friendly greeting."""
    return f"Hello, {name}! 👋"

# ---- Resources ----
@server.resource("local://time")
async def local_time():
    now = datetime.datetime.now().isoformat()
    return TextContent(type="text", text=f"Local time is {now}")

async def main():
    tools = [Tool(name="say_hello", description="Greet by name", inputSchema={"type":"object","properties":{"name":{"type":"string"}},"required":["name"]})]
    async with stdio_server(server, tools=tools):
        await asyncio.Event().wait()

if __name__ == "__main__":
    asyncio.run(main())
Run it:
python server.pyThis launches a stdio MCP server named python-hello. You’ll connect a client next. (The Python SDK handles protocol messaging/handshakes for you.) (GitHub)
4) Quick Start: Node.js MCP Server
mkdir mcp-node-hello && cd mcp-node-hello
npm init -y
npm install @modelcontextprotocol/sdk
server.mjs
import { StdioServer, Tool } from "@modelcontextprotocol/sdk/server";

const server = new StdioServer({
  name: "node-hello",
});

server.tool(
  new Tool({
    name: "echo",
    description: "Echo a message back.",
    inputSchema: {
      type: "object",
      properties: { message: { type: "string" } },
      required: ["message"],
    },
    handler: async ({ message }) => `You said: ${message}`,
  })
);

// Minimal resource example:
server.resource({
  uri: "local://info",
  get: async () => ({
    type: "text",
    text: "Node MCP server up and running.",
  }),
});

await server.start();
Run it:
node server.mjsThis exposes a tool (echo) and a resource (local://info) over stdio using the official Node SDK. (Model Context Protocol)
5) Connect from Claude Desktop (Local)
Claude Desktop can auto-start and connect to your local MCP servers via a simple JSON config. Create the config file per the docs, pointing to your server binaries and arguments. (Model Context Protocol)
macOS
~/Library/Application Support/Claude/claude_desktop_config.jsonWindows
%AppData%\Claude\claude_desktop_config.jsonLinux
~/.config/Claude/claude_desktop_config.jsonExample config (both Python and Node servers):
{
  "mcpServers": {
    "python-hello": {
      "command": "python",
      "args": ["server.py"],
      "cwd": "/absolute/path/to/mcp-python-hello"
    },
    "node-hello": {
      "command": "node",
      "args": ["server.mjs"],
      "cwd": "/absolute/path/to/mcp-node-hello"
    }
  }
}
Restart Claude Desktop. In a new chat, try:
“Use the
python-helloserver’ssay_hellotool with name ‘Abhigyan’.”
“Read thelocal://inforesource from thenode-helloserver.”
(Claude Desktop’s integration with MCP servers and configuration is described in the official docs.) (Claude Docs)
6) Add Real Tasks
Here are three practical tools you can add to any server:
A) Filesystem read (resource)
Expose a safe directory and allow read-only access (never expose secrets):
Python
import pathlib
base = pathlib.Path.home() / "mcp-safe"

@server.resource("fs://readme")
async def readme():
    p = base / "README.txt"
    text = p.read_text()
    return TextContent(type="text", text=text)
B) HTTP fetch (tool)
import httpx
@server.tool()
async def fetch_url(url: str) -> str:
    """Fetch URL (GET) and return first 500 chars."""
    async with httpx.AsyncClient(timeout=10) as client:
        r = await client.get(url, follow_redirects=True)
    return r.text[:500]
C) Docker control (tool) — via a dedicated Docker MCP server
Instead of granting shell, point your client to a Docker MCP server which exposes safe operations like listing containers, starting/stopping, composing stacks. Community examples exist and Docker’s blog covers production patterns. (GitHub)
7) Run MCP Servers in Docker
Containerizing servers keeps environments consistent and portable. Docker has showcased MCP usage patterns, and you can package your own with a minimal image. (Docker)
Dockerfile (Python server)
FROM python:3.12-slim

WORKDIR /app
COPY server.py /app/server.py

# Optional: httpx for the fetch tool
RUN pip install --no-cache-dir mcp httpx

# Run as non-root for safety
RUN useradd -m appuser
USER appuser

ENTRYPOINT ["python", "server.py"]
Build & run:
docker build -t mcp-python-hello:latest .
docker run --rm -it mcp-python-hello:latest
Tip: If your server needs files, mount a volume:
docker run --rm -it -v "$PWD/data:/app/data:ro" mcp-python-hello:latestDocker Compose (Python + Node together)
docker-compose.yml
services:
  mcp-python-hello:
    build:
      context: ./mcp-python-hello
    tty: true

  mcp-node-hello:
    build:
      context: ./mcp-node-hello
    tty: true
Start both:
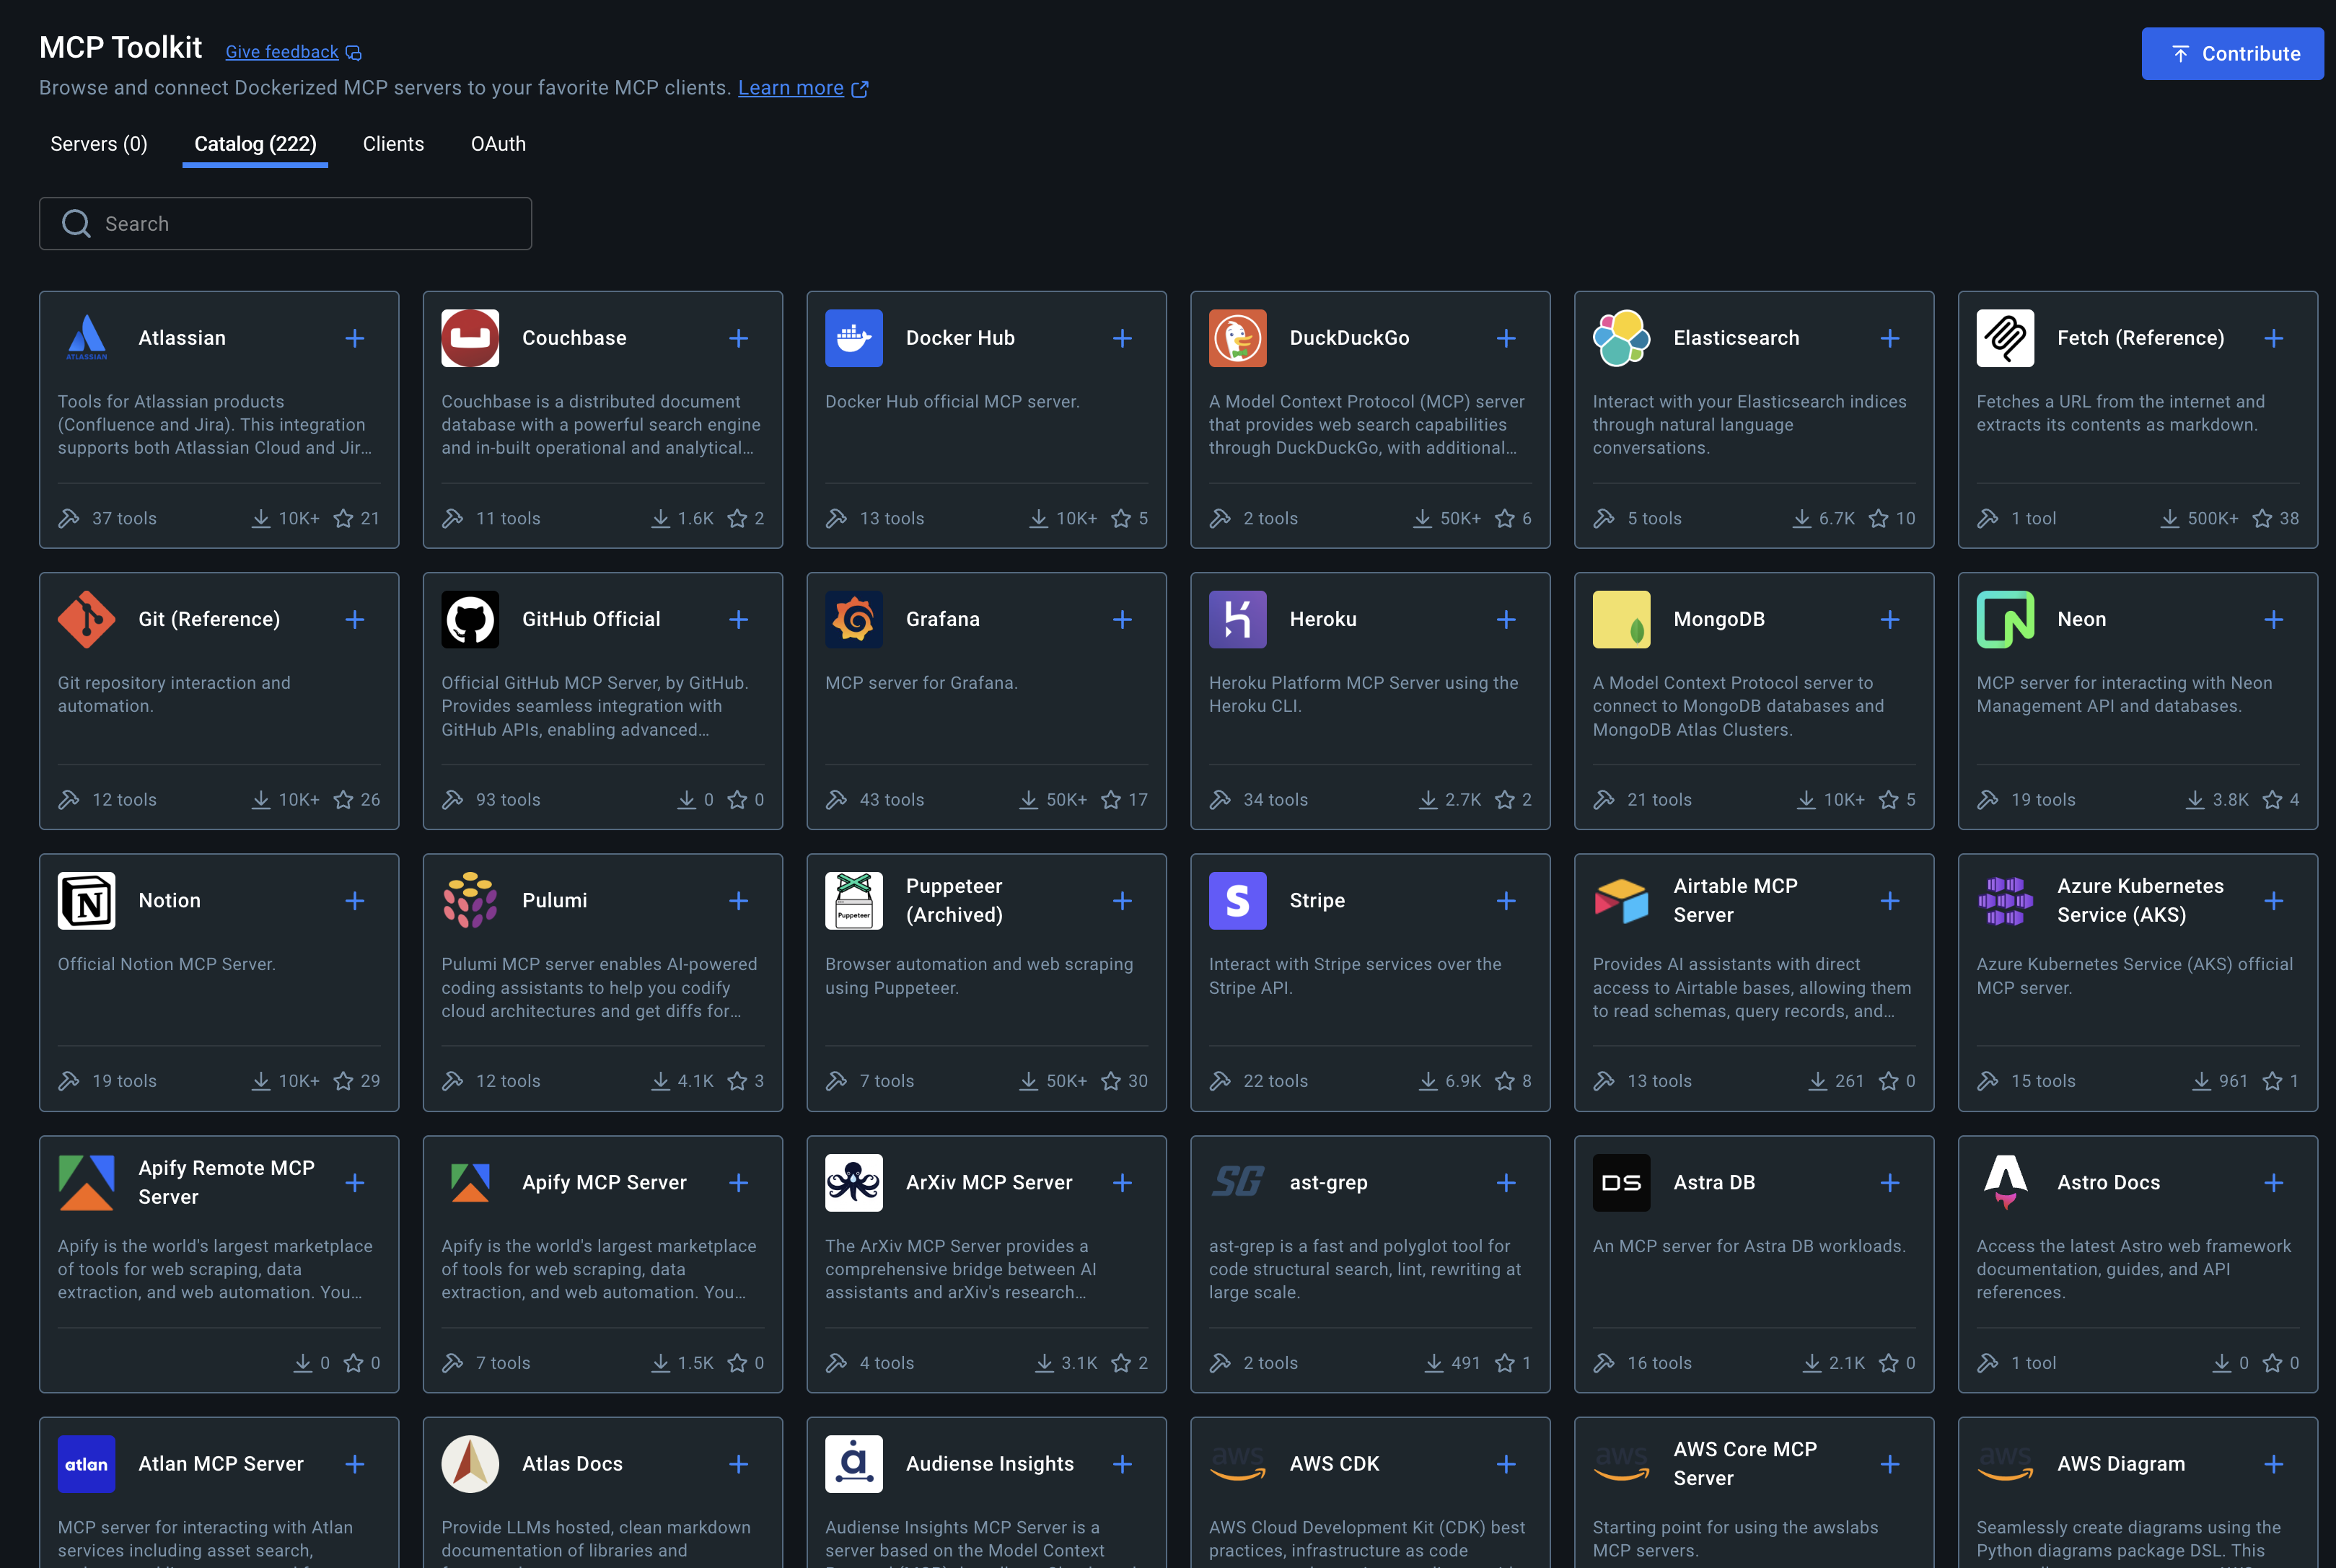
docker compose up --buildThen point Claude Desktop to run these via docker exec (advanced), or more simply run them on your host and let Claude Desktop manage startup via stdio as shown earlier. For production pipelines and catalogs of MCP servers, see community write-ups on running MCP servers from Docker Desktop. (Medium)
8) Using an MCP Client (DIY)
You don’t have to use Claude Desktop—you can write your own client that connects to any MCP server. The official quickstart shows how to build an LLM chatbot client that speaks MCP (Python/Node/Java/Kotlin/C#). (Model Context Protocol)
Parse server capabilities.
List tools/resources/prompts.
Call tools with structured input and stream responses.
Route model messages ↔ MCP messages.
9) Security & Permissions
Least privilege: expose only the minimal directory, DB, or API scopes your use case needs.
User confirmation: MCP clients typically surface tool calls for approval before execution.
Network egress: if you allow HTTP, restrict destinations or filter content.
Auditability: log tool invocations and inputs/outputs (sans secrets).
Desktop Extensions: for Claude, packaging servers as “Desktop Extensions” provides one-click installation and a permissioned UX. (Anthropic)
10) Troubleshooting
Server never appears in client
Double-check yourclaude_desktop_config.jsonpath and JSON syntax; ensure commands are resolvable (absolutecwd, correctpython/node). (Model Context Protocol)
Transport errors
Start with stdio (simplest). If using HTTP/SSE, confirm ports and CORS per SDK docs. (GitHub)
Tool schema mismatch
Ensure your inputSchema matches what the client sends. Use simple types first (string, number) and add objects incrementally. (Model Context Protocol)
Docker container exits immediately
Your entrypoint likely finished. Run servers in the foreground (no daemons), or add tty: true in Compose while developing. (Docker)
11) Where to Go Next
Official site & spec — concepts, examples, and reference. (Model Context Protocol)
SDKs & templates — Python/Node repos and quickstarts. (GitHub)
Claude Desktop config — connecting local servers, Desktop Extensions. (Model Context Protocol)
Docker + MCP — blog posts and examples for packaging & production. (Docker)
Ecosystem news & case studies — launch posts and coverage. (Anthropic)
Comments (0)
No comments yet. Be the first to share your thoughts!